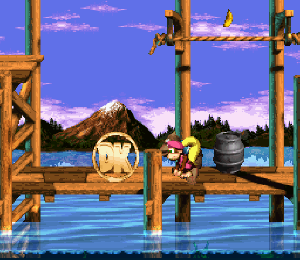
Now I knew for a while that this game was coming. I'd heard about it, seen some screenshots of it, but like Donkey Kong Country 3, it was Nintendo Power that showed me just incredible it was shaping up to be. Instead of reading about it in an issue, Nintendo Power sent their subscribers one of their videos that they would often put out to promote upcoming products (others that I got included videos for the release of the Nintendo 64, Diddy Kong Racing, and Pokemon.) Two of the games that this video talked about were Jet Force Gemini and Donkey Kong 64 and while I would end getting both games that Christmas, the latter was the one I was the most excited about. The footage on the video made it look like this was Donkey Kong on steroids, just the biggest, most spectacular game in the entire series and of all time. I also knew going into it that it was going to be different than the Donkey Kong Country games and would be an exploratory one like Super Mario 64 and Banjo-Kazooie. And while I would eventually enjoy playing it, first getting into it would be a little frustrating.
It was amazing the bad luck I seemed to have when I first tried to play this game. First off, it was the first game to require the new expansion pack for the Nintendo 64. So just to be safe, I unhooked the system and then put the pack in. Unfortunately, unplugging and plugging the system back in was not as easy as you would think due to the state of my TV and tabletop at the time. Once I put the game in, it was all cloudy and static-filled. I had to keep jiggling the cord back there to keep it clear so I missed almost the entire DK rap at the beginning of the game and didn't even know it was going on for a while. Finally, I get it clear and start playing the game. I watched the opening FMV for the game and was quite impressed. But then when the actual gameplay started, Donkey Kong started moving before I touched the control stick and I realized what had happened: the controller was stuck in that annoying mode that happens when the stick was moved before the game was turned on and now you're struggling with your character. I had to reset the game and watch that entire opening sequence AGAIN! I was not a happy kid. But when I finally got everything under control and was able to get into the game, I started to enjoy it.
Let's talk first about the first thing you see when you start the game: the DK rap. From what I understand, people have mostly mixed feelings about the rap: some like it, some hate it. Me, I think it's awesome. I know people say it's overly silly but by this time, I think the games had really embraced how absurd the premise was and went with it. Yeah, seeing the Kong family members standing in a group while a guy raps about each of them is silly but these games are meant to be silly and fun. The thing that shocked me a bit when I first heard it was they said Chunky Kong was, "One hell of a guy." I couldn't believe that somebody just swore in a Nintendo game. It was unheard of for me at that time. Of course, I had no idea what was to come. (Conker's Bad Fur Day.)
The plot for the game is a combination between the one for the original Donkey Kong Country and the ones for the sequels. King K. Rool is back once again to cause havoc on Donkey Kong Island. He now resides within a floating fortress that has a Death Star-like weapon that can destroy the island in one blast. But something goes wrong, of course, and K. Rool has to resort to his usual plan while he waits for the weapon to be repaired: kidnap the Kongs and steal their bananas. You start out as Donkey Kong and you're warned by Squawks what has happened. That's when you start exploring various areas of the island, freeing your friends and reclaiming your bananas.
As I said, the gameplay is completely different from the Donkey Kong Country games. Instead of going through various levels in different parts of the island, you explore deep, fully 3-D worlds like in Super Mario 64 and also like that game, you have a set number of goals you must complete to get important items (your bananas in this case.) In each world, there are bananas that can only reached by a certain Kong, so you have to keep going back and forth with different characters to get all of them. Like the Donkey Kong Country sequels, you have to pay for the services of the other Kong family members with Banana Coins you collect. And just like bananas, there are some of those that can only be collected by certain characters too. You also have ammo that you must collect for your individual Kongs' weapons, crystal coconuts to fuel special moves you can learn to do, headphones to replenish musical attacks you learn, and much more. You also have to collect blueprints for K. Rool's weapon to get bananas and to make the final level easier for yourself.
You've got new Kong family members to play as as well. Besides the essential Donkey Kong and Diddy, there's Lanky Kong, an orangutan-like guy with a clown-like face. His long arms prove to be useful in taking out bad guys from great distances. Tiny Kong is Dixie's little sister who can float in the air with her pigtails and can live up to her name when you buy a formula from Cranky. Chunky Kong is an overgrown toddler of an ape, even a bit bigger than Donkey Kong apparently. He's Kiddy's brother but despite his size, he's quite a coward and more than a little simple. But his strength proves to come in handy.
No other new Kong family members are introduced but the supporting ones now all have new services. Cranky Kong is back once again and he's apparently a scientist this time, mixing up chemicals that you can buy to give you special abilities. Also returning for a fourth time is the always cool Funky Kong, who now owns a weapon shop and gives your characters their own individual guns. (Not as un-kiddy friendly as you think though.) Candy Kong returns for the first time since the original Donkey Kong Country and now owns a music shop where you can buy musical instruments that can take out enemies as well as find secrets. But an aspect of this game that kind of disturbed me was Wrinkly Kong, who has died since Donkey Kong Country 3 and is now a ghost! She still gives advice but the very idea that she died and her husband Cranky didn't even acknowledge it kind of bothered me! Even now, I think it's a bit too morbid for this series.
This game was a lot of fun in many aspects but in others it felt either derivative or annoying. The good aspects are that this game never fails to entertain. There are many hilarious cut-scenes that occur when you defeat a boss or activate a special part of the game. It's funny to see K. Rool's reactions when he sees that things aren't going well for him and you're managing to reclaim your bananas. One of my favorites is when a Krusha tries to escape from the fortress when he realizes that things are going belly-up for the Kremlings. K. Rool, however, hears him talk trash about him and sics a giant Klap-Trap on him! Also funny are the reactions to the various Kongs when you enter a boss fight and they see the boss. I also like Snide, a weasel who helped K. Rool build the death-ray machine but now helps you defeat him because the Kremling king booted him out.
I also liked the enormous variety of the gameplay and how it gave every Kong a shining moment. For one, each Kong has a boss that only they can defeat. Also, each Kong has his or her own specific special moves, weapon, or musical instrument. Every Kong, however, can use these oranges that explode on contact to defeat enemies. Some of the stuff the individual enemies do when they're defeated is hilarious. My favorite is when you blow away the big, fat Klumps: they spin around, salute, and then fall over backwards. Hilarious.
I liked the portrayal of King K. Rool this time around. First off, he is a king again like he was in the original Donkey Kong Country, reverting back to his original design instead of the disguises he used in the sequels. But, he's a bit more intimidating than he was previously. He sits in his throne room, watching everything on video monitors, and even makes Darth Vader-like deep breathing sounds. He actually has some dialogue at the beginning of the game and it's clear that his minions are quite terrified of him. The cut scenes where he yells at certain enemies who've failed to defeat you and the fact that he's imprisoned a big relative K. Lumsy in a floating cage attached to the island makes him seem a lot more like a tyrant than he's been before. But the final battle with him shows he hasn't lost his flare for being outrageous.
Speaking of which, the final battle is hilarious. After you release K. Lumsy and he crashes K. Rool's escape jet when he tries to get away, you jump into a hole in the plane and proceed to face K. Rool in a boxing match! Like all the other attributes of the game, each Kong faces him in their own section. The funniest is the section after Diddy faces him. The end of that part leaves K. Rool with an overhead lamp stuck on his head and he can't see. As Lanky, you have to attract K. Rool by playing your trombone and have him slip on banana peals. Tiny's section is also funny: she shrinks down to her small size, you go inside K. Rool's shoe, and shoot his toes with your crossbow. The cut-scenes in between each section are the funniest of all. The stuff these Kritters go through to try to ring the bell before K. Rool gets disqualified are very funny.
One of the game's weak points, however, is how it's a bit derivative of other games. The game that comes to mind the most when playing it is Banjo-Kazooie. The worlds you explore are similar in design to that game (in fact, so is the whole game), K. Rool lives in a lair that you have to scale to face him, just like Gruntilda in Banjo-Kazooie, and a lot of the music sounds like music in that game. That was immediately the first stuff I thought of when I played the game the first time and heard the music. It doesn't feel like its own entity. I also thought the animal friends weren't used to the best of their abilities. There are only three in the game and one you can't even play as. Squawks appears in various parts of the game but you can never play as him. You can play as Rhambi and Enguarde but only when a specific task can be completed by them and you can only become them, not ride. Donkey Kong can become Rhambi and Lanky can become Enguarde. I guess they'd packed too much into the game already but I thought they could have been more creative with the characters.
Also like Banjo-Kazooie, some of the stuff you're asked to do to get bananas are ridiculously hard and almost impossible. With a lot of luck and patience, I eventually collected all the jigsaw pieces in Banjo-Kazooie. To this day, I have never been able to get all the bananas in Donkey Kong 64. Some of them I feel are impossible to get. The races you have to do as Lanky with this sliding beetle I think are just impossible. I can never beat that little shit. Other times, I don't think the game makes it clear enough what exactly you're supposed to do to accomplish your goals. Or maybe I'm just stupid, I don't know which. Sometimes, the camera angles are bad and you can't see exactly what you're doing, a common problem in games like this. That often causes me to fall from certain spots and it's usually a nightmare to get back up to where I need to be. Just because a game is hard doesn't mean it's bad but I feel that some, like this, go a little too far.
While I do indeed like Donkey Kong 64 and enjoy playing it, I don't think it's quite on par with the Donkey Kong Country games. Because of its different style of gameplay, I don't consider it a part of that series. It's an exploratory game that is fun but is also very derivative of other games that came before it. Still, it's hard to argue with a game as entertaining as it is so while I do think it's not 100% perfect, it's worthy of having the Donkey Kong name on it and worth playing by fans. After this, I was anticipating the next Donkey Kong game but none of the ones released for the GameCube really interested me enough in buying them. Donkey Konga especially didn't appeal to me at all. Little did I know that another great Donkey Kong game would come eventually but not for over a decade after Donkey Kong 64.
Monday, February 28, 2011
Sunday, February 27, 2011
Stuff I Grew Up With/Video Game Corner: Donkey Kong Country 3: Dixie Kong's Double Trouble! (1996)

Noticing a pattern yet with the plots of these games? In the previous one, you had Diddy Kong step up to the plate to become the main character after Donkey Kong disappeared and now, both Donkey and Diddy have disappeared, leaving Dixie Kong as the main character and the one who must rescue them. And just as she was introduced as a sidekick for Diddy previously, she's given one herself here in the form of the overgrown baby, Kiddy Kong (basically Donkey Kong Jr. from the original NES games in blue pajamas). Instead of journeying across an island like the in the previous games, the two Kongs must now explore an enormous area known as the Northern Kremisphere to find their friends and defeat the Kremlings, who are now, as was hinted at in the months before the game's release, supposedly under the rule of a new leader named Kaos. However, you eventually find out that it's another plot orchestrated by King K. Rool, who's now dressed up as a mad scientist and calling himself Baron K. Roolenstein (even more ridiculous than his pirate disguise in the second game).


Just as the second game built upon the first, this one follows suit and makes the gameplay even more complex than before. For one, progressing through the game is not done on a linear path like before; here, you have to use boats built by Funky Kong to reach various spots of land where the gameplay areas can be found and, as you complete them, you're given parts that you have to take back to Funky so he can build more advanced boats that allow you to get around obstacles on the overworld map screen (like rocks and small waterfalls) in order to reach more areas. Also like the second game, you have to collect coins in order to find everything it has to offer and reach the biggest percentage possible (103% is the main goal, although you can also go as high as 105%). You receive Bonus Coins for completing the levels' bonus areas and for defeating the bosses, although they don't actually come into play until very late in the game, and you have to collect DK coins again, which are this time held in each level by a particular Kremling called Koin, although here they don't seem to serve any in-game purpose besides being necessary to get a high score. But, that's still just the tip of the iceberg: you also have to collect Bear Coins to pay for the services of the Kong family members and new allies named the Brothers Bear, the latter of whom you find yourself collecting various items for to progress even further into the game. And on top of that, there are these Banana Birds that you have to release from the many hidden caves K. Rool has imprisoned them and reunite them with their mother in order to get the real ending. So, as you can see, we've come a long way from simply having to reclaim your banana hoard.


The dynamic between Dixie Kong and her new sidekick, Kiddy Kong, who's the only new Kong family member introduced here, is very similar to that between Donkey Kong and Diddy in the original in how one is smaller and more agile, if a little weak, while the other is big and powerful but a little more cumbersome in some areas (so much so that some fans wish Donkey Kong himself had teamed up with Dixie instead of the developers coming up with an all-new character). Dixie retains her trademark Helicopter Spin from the previous game and is much more adept at climbing and swimming than Kiddy, but she's unable to defeat certain enemies because of how small she is. Kiddy, meanwhile, is slower, not as light on his feet, and is an easy target because of his size, but has no problem in bashing and rolling over many types of enemies. And like Dixie, he has a special move all his own: an ability to roll and bounce across the surface of water, which is tricky to get a feel for but is something you have to learn in order to reach certain bonus levels and items. There also some team-moves that both Kongs can do together: a Team-Toss where Kiddy throws Dixie up to otherwise unreachable spots, a Body-Slam where Dixie picks Kiddy up and uses his girth to smash through weak spots in the floor, and she can also toss him against the wall and ride atop him like a barrel (there aren't many parts in the game where this move is that useful, though). Finally, like before, the characters have their own unique animations. When standing still, Dixie chews and blows bubblegum like before, whereas Kiddy fiddles with a loose string on the foot of his pajamas and pulls on it until he falls backwards. And when you lose a life, Dixie cries again while Kiddy throws an angry tantrum while kicking his feet.


This time, rather than allowing you to fly back to levels you've already visited, Funky Kong enables you to explore the entire overworld by building boats, hovercrafts, and other vehicles, although like I said, you have to find items that he can use to build these things (you need to gain access to all of his vehicles to find everything in the game). Wrinkly Kong, Cranky Kong's kindly wife, is back from the second game but has quite being a teacher and now stays at home either doing aerobics or play the Nintendo 64 (which was released the same years as this, making for a sly bit of promotion)! She still allows you to save your game like before, even if she's asleep when you visit her. Another holdover from the second game is Swanky Kong, who now runs a carnival sideshow game where you have to hit targets with throwing balls in order to collect items like bananas and Bear Coins. There are three types of games: Head-to-Head, where the goal is to make the image of your face on the side of the screen smile before the other player; Race to 25, where you have to be the first to get 25 points; and Endurance, where the first person who misses a target loses. These games are quite addicting and also make for good practice for a specific boss fight late in the game. Instead of dishing out advice like before, Cranky Kong is your opponent in the ball tossing game when you're playing in one-player mode. Despite his boasting, he's better at them than you might expect but he makes them even more fun to play because of his reactions when you beat him, which range from making up excuses and accusing you of cheating to even chasing you out of the tent!


In addition to the other Kong family members, you also receive help, both intentionally and, in some cases, unintentionally, from the Brothers Bear: thirteen bears scattered throughout the Northern Kremisphere. Most of them are genuinely helpful, while others actually require your assistance and you must help them in order to get the highest percentage possible. Barter Bear, the first one you encounter, is the best in that he gives you items, hints, and so on. Barnacle Bear is the typical old salty sea dog, whose favorite seashell you must recover. Blue Bear is rather depressing one because his brothers have forgotten his birthday and cheering him up proves to be worth your while. Bazooka Bear is a big, blustery general whose cannon, Big Bessie, helps you to get up to a cave with a Banana Bird in it. Blizzard Bear is a mountain climber whom you encounter in the snowy area of K3 and whose present for Blue is part of a complex system tied into the game's puzzles. Benny and Bjorn Bear are two twins who run a chairlift service in one area and whose service is, not surprisingly, useful to you. Baffle Bear is a codebreaker who helps you in figuring out how to open up this game's lost world. Boomer Bear resides in said lost world and you have to pay him the Bonus Coins in order for him to help you proceed throughout it. Barter Bear owns a swap shop near K3 and can provide you with useful items. Bramble Bear is a flower enthusiast whose passion for flowers is key to getting everything there is to get in the game. The last two bears, however, are rather antagonistic. Blunder Bear is a stupid know-it-all who acts like he's better than everyone but whose big mouth lets you in on stuff he didn't want to tell you. The most unlikable is Brash Bear, who really lives up to his name: he's an arrogant asshole who's very proud of his swimming record in a certain level and you have to beat it in order to get a Banana Bird (once you've done so, go back to his hut and watch how much of a sore loser he is!)


Among the animal friends (whom you more often turn into this time than ride), there are three holdovers from the two previous games and two newcomers. Ellie the elephant takes the place of Rambi the Rhino, although she's not nearly as badass. Her pros: she can carry barrels with her trunk, as well as inhale and spray water and suck objects towards her with it; her cons: if she sees one of the Sneek rat enemies, she freaks and runs away (one of the game's last levels is built around this idea), and she's also not the best when it comes to jumping on platforms. The other newcomer is Parry the Parallel Bird, who has to be the most frustrating animal friend in the entire series. He flies directly above and follows you, hence his name, and collects items that are out of reach, while also single-handedly defeating the Booty Bird enemies. That's great and all but, at the same time, you often have to jump at the right points in order to make him dodge other enemies in his path, which is often very difficult. And just to be dicks, the game designers decided to make him the key to getting all the bonus areas in certain levels, as he sometimes turns into a Bonus Barrel when you cross the "No Parry" sign. Yeah, not one of my favorite animal friends by a long shot. Now, of the three returning animal friends, there's our favorite green parrot, Squawks, who, as in the previous game, carries you around and kills enemies with eggs that he spits out of his mouth. His purple cousin is also back but is a bit more useful this time around, as he can actually fly up now and, while he still can't spit eggs, can grab barrels to use as weapons. Enguarde the swordfish is also back, making him and Squawks the two animal friends to appear in all three of the original Super NES games, and is just as useful as ever in the always frustrating underwater levels. And finally, Squitter the spider returns from the second game and, like before, is a very useful friend with his web attacks and platforms.

Like the previous games, some of the most useful items are the various types of barrels and crates. And like the second game, in addition to old favorites, like the rolling barrels, steel kegs (which were absent from the previous game), and throwing crates, the DK Barrel, the Continue Barrel, the TNT Barrel, the Animal Barrels and Crates, the Invincibility Barrels, and the Bonus Barrels (all of the bonuses here are accessed by them), as well as hidden Warp Barrels in many levels of the first two levels, there are also some new additions. In one climbing level, you use Barrel Shields to protect yourself from projectiles being thrown at you. Switch Barrels change the type of barrels that nearby Bazukas fire repeatedly, being it to normal barrels that you can safely bounce across or TNT Barrels and Steel Kegs that can clear obstacles for you. Several new types of Barrel Cannons are also introduced, like Rocket Barrels that you ride for short distances, Tracker Barrels that follow you on designated paths below while firing you repeatedly, and Ghost Barrels that appear and disappear repeatedly, sometimes aiming in different directions every time they materialize (in the level where the latter appear, you often have to avoid them because they'll shoot you into enemies).

Item-wise, there's not much different here. You once again have bananas, either in bunches or in long trails, that give you an extra life for every one hundred, extra life balloons that are color-coded (you should know the code by this point), and KONG Letters that give you an extra life when you collect all four. Instead of Kremkoins, you now receive Bonus Coins for completing bonus levels and defeating some bosses, and each level has an enemy called Koin whom you can get a DK Coin from if you defeat him (if you can collect all of them, Funky Kong rewards you with his ultimate invention: the Gyrocopter, allowing you access to every imaginable spot on the overworld). Aside from the Bear Coins, which are now the common currency for the Kong family and the Brothers Bear, the most notable "items" are the Banana Birds, who've been imprisoned by K. Rool in fifteen caves strewn throughout the overworld and individual area maps (you need to gain access to all of Funky's vehicles to find them all). To release each one of them, you have to repeat a musical tune that's played on the crystals with the buttons on the controller. The more caves you uncover, the longer and more complex the tunes become and if you mess up, you have to start over again and with a different tune, no less. The Banana Birds take up residence with Wrinkly Kong when they've been freed and after you've found them all, you go to Wrinkly's place again and the birds will carry you up into the clouds to their mother, the Queen Banana Bird, leading into the game's real ending.


As I said earlier, most of the enemies this time aren't as outrageous or silly as they were in the second game but, like that game, most of them are merely stand-ins for or redesigned versions of those that have come before. Sneeks, the successor to the previous game's Neeks, are really nasty-looking rats who, as I said, Ellie is terrified of. Bristles, obvious successors to the second game's Spinys, are hedgehogs that are reminiscent of the original game's Armies as they will sometimes roll. Nids are hopping spiders with platforms on their backs that can be useful but can also screw you over if you're not careful and will break a barrel with their legs if you touch them. Lemguins are penguin-like critters that slide on their bellies in long lines across the snow and can easily snag you if you're not careful, especially since you can't roll into them from the front because of their beaks. Knik-Knaks are an obvious answer to the second game's Click-Clacks: beetles that, depending on their color, either walk or fly in place. And seeing as how there were no evil primate characters like the original's Manky Kong in the second game, this one introduces Minkeys, evil little monkeys in trees that throw nuts at you (you know what I meant by that)


Among flying enemies, the only normal looking are Swoopies: woodpeckers that tend to fly in long lines and are among the most frustrating flying enemies in the series, although you can use them as stepping stones when they get stuck in the tree trunks by their beaks. Booty Birds, on the other hand, are some of the funniest enemies: big fat birds that you can pop to receive items but can still hurt you if you touch them. Karbines are evil owls in one factory level that fly in the background where you can't get at them and shoot lava balls at you. The good news is that the Zingers aren't in this game; the bad news is that they've been replaced by a new bee enemy: a mechanical monstrosity called Buzz, who has a freaking ripsaw in his abdomen! They serve the same basic function as the Zingers and can be killed in the same ways, so you might as well just call them Zingers. And as in the second game, there are tougher red varieties but, fortunately, these can be taken out by TNT barrels.


Among the underwater enemies, the most innocuous are Kocos: clownfish that function like the Bitesizes in the original game, swimming back and forth, without being overtly aggressive, but are often found in spots that make them hard to avoid and their speed and movement patterns often very. Bazzas are barracuda-like fish that swim in lines that made up of anywhere from two to four fish. They swim continuously out of and into bits of coral in the walls and are one of the enemies that tend to get me a lot whenever I play. Bounty Bass is basically the underwater equivalent of Booty Bird: a big, fat fish that give you items when you pop him with Enguarde's bill. Gleamin' Breams are another type of fat fish that will lighten up a particularly dark, underwater level when you prod them but, like Booty Bird, both they and the Bounty Bass can hurt you if you actually touch them. Nibbla is a piranha-like fish whos actually helpful in one particular level but only if you keep him fed; otherwise, he stalks you throughout several levels, waiting for you to fall into the water so he can jump on you (he's like this game's equivalent of the previous one's Snapjaw). The worst underwater enemies by far are the Lurchins: urchins that you can only kill with Enguarde when their soft insides are exposed. Like Zingers, they're often placed in the worst spots and often in big schools that make them hard to avoid.


Again, the Kremlings here are a bit more simple and less cartoonish for the most part. Kobble is basically the new version of Kritter: he does little more than walk back and forth but can be a threat. Re-Koils take the place of the second game's Kaboings: they jump up and down with their springy tails, either in place or back and forth, or sometimes convulse up and down without actually jumping. Krimp is nothing more than a renamed, redesigned Klap-Trap: much more ferocious looking but no more dangerous. The same goes for Krumple, the new version of Krusha, right down to only being vulnerable to certain attacks. Like the previous game, there are also several types of barrel enemies but these guys are much more unique. Knockas do what the green Klobbers in the second game did, which is just push you around; Klasps hide in TNT barrels while hanging onto ropes and following your every move, waiting to blow you up; and Kuchukas sit in one spot and lob bombs at you, either one at a time or by the handful. Skiddas are Kremlings who can be found in snowy levels, skidding back and forth in narrow spots. Kuff N' Klout are pairs of twins who are only found in the lost world levels, which is good because they're a real nightmare with their various attack patterns, which consist of jumping at you from various distances, charging at you, or alternating between both. Kopters are one of the most annoying Kremlings as they can slice into you with their blades and are completely invulnerable. Bazzukas have big cannons that shoot various barrels at you and are almost impossible to defeat. And Koin, as I've said before, has the DK coin in each level, which he uses as a shield against you, turning it so it faces no matter where you are. To get the coin, you have to hit him in the back with a steel keg, which is initially as simple as throwing it over him and having it bounce off a wall behind him but, as the levels progress, this becomes more and more challenging and you have to devise different ways of doing it (fortunately, the steel kegs near him often respawn indefinitely, giving you as many chances as you need). One level late in the game features purple cousins of his called Koindozers, who are probably the worst enemies in the entire game as they can't be defeated at all and can very easily get into a spot where they can repeatedly push you with their shield into oblivion.
Reading up, I've learned that the aspect of the game that was the most criticized when it was originally released is the music, which is something I have to agree with. While the game's soundtrack is not horrible, I would say it's my least favorite of the three original Super NES games, as it doesn't have the same unique feel and flavor of its predecessors. A big reason for that could be the fact that this time, the music is mostly by Eveline Fischer, with David Wise only providing a few additional pieces (he would later rescore the game completely when it was ported over to the GameBoy Advance and, from the bits that I've heard, I think it's better music). A lot of the game is very generic and uninspired in how it sounds, especially the opening fanfare, the piece for the title screen (which is just low drumming accompanied by the sounds of monkeys hooting), and the piece for when you choose between either a one-player or two-player game. The theme for the overworld map is so generic that I don't even know how to describe it, and the same goes for the themes for the area maps (they're nowhere near as catchy as what was heard before, although the one for Krematoa's, the lost world, mapscreen is kind of cool, especially since it starts with such a menacing sound), Funky's Boat Rentals (it's an odd-sounding piece with a bizarre vocal sound effect that's meant to accentuate Funky's "dude!" personality but is just weird for the most part), Swanky's Sideshow (the screen where you walk up and leave after the game has a bland piece that just barely fits with the motif, as does the theme for the games themselves, although there is a nice differentiation for when you win and when Cranky wins), Wrinkly's Save Cave (which is different depending on what she's doing when you drop in, ranging from an aerobics-like bit for when she's exercising, a forgettable, "gaming" theme when she's playing the Nintendo 64, and slow one for when she's sleeping), and the Banana Birds' Crystal Caves (it's meant to sound mysterious and magical but I've heard numerous other pieces of music, including from this very series, that do that job much better). I do, however, really like the bouncy, country-esque theme you hear whenever you visit one of the Brothers Bear and find myself nodding my head along to it when I hear it, as I do the upbeat, jazzy-sounding bonus level theme (I like it more than the previous game's).
As for the music for the various types of levels, the music for the lakeside stages is another pretty forgettable and uninspired piece, not even close to being on the level of the first stage themes in the previous games. The theme for the mill levels is also fairly standard, with a quick, constant beat accompanied by a generic-sounding melody and while the music for the snow levels is definitely better, with an appropriate, crystal-clinking sound that accentuates the environments, it's got nothing on the music David Wise composed for the original's snow levels. The music for the forest levels is actually quite nice, with a mysterious-sounding windpipe beat and a quick but relaxed tapping melody to go along with it, and the levels where you're forced to move really fast (mostly toboggan levels, which take the place of the previous games' mine-cart and rollercoaster stages) has probably my favorite piece of music in the entire game: a cool-sounding, synthesizer-esque, driving theme that has a really nice sound and feel to it. I can't say the same for the riverside levels, which have a low-key and chipper-sounding theme, which often doesn't fit with the crap you're being forced to do. The underwater levels have a theme that's actually pretty dark and unsettling, managing to make you quite tense from the atmosphere it creates, which is a far cry from the original's soothing and beautiful Aquatic Ambience. The waterfall levels have a very ethereal, dream-like piece of music that fits quite well with the beauty of the falls you're making your way up (although it doesn't make the levels any less frustrating, as we'll see). Like their counterparts in the original game, the factory levels have an industrial-sounding, bombastic, and loud theme that actually has a kind of Nine Inch Nails aesthetic to it and definitely fits with how hellish those stages can be. The cliffside levels have a similarly hard-hitting, rocking theme that's constantly driving the action, with a pounding beat, a nice melody to go along with it, and even a really cool guitar solo in the middle of it. The two levels where you find yourself navigating around the large sewer pipes have another strange, ethereal theme to them, akin to the waterfall levels but with a noticeably more eerie sound, which accentuates the bizarre, trippy gimmicks those levels have. I really don't care for the cave level theme, which is another generic piece like the lakeside theme that tries to be unusual and driving but just doesn't grab me. The few jungle levels in the game have the craziest theme, which is a rapid, manic-sounding, random piece often accompanied by the crazed sounds of monkeys hooting. There's no other way to describe it other than crazy. The final real level in the game has a crazy, rapid, computerized theme that can really make you nervous, which is not something you want to be in that particular stage.
The boss battles have a pretty catchy, low-sounding, menacing theme that makes the battles more memorable, although I don't care for the theme that accompanies the battles with Baron K. Roolenstein, which tries to outdo the typical boss theme but doesn't come off as memorable for me. And the music for the "cast list" that plays before the ending credits after you defeat K. Roolenstein for the first time? Get it out of here. It's the very definition of uninspired and generic (I know I've used that word too many times now but it's what comes to mind when I think about a big chunk of this game's music score). The Queen Banana Bird's home has a nicely tinkling and magical-sounding theme that's kind of like a sped-up version of the Crystal Caves theme, only a lot more memorable. And finally, the music for the real ending is okay but, again, I've heard better, and I don't care for the constant beat at the end of the piece.


Doorstop Dash: The first mill level introduces you to the types of interesting gimmicks these particular levels tend to have: in this case, you have to grab ahold of various handles in order to open the metal doors and then quickly run through them to progress through the level because, once you let go of a handle, the door will gradually close. Sometimes, the handle that corresponds to a given door is right in front of it but, as the stage goes on, you find yourself pulling the handle and then having to blast yourself through the doorway with a Barrel Cannon or having to run, climb, or jump a distance as quickly as possible in order to make it through the door. It's actually not that hard once you know what you're doing, and while there are some trapdoors in the floor that you fall through when you jump on them and lifts you have to ride, it doesn't make for much of a challenge. The introduction of Buzzes and Re-Koils, however, give you a little more to worry about. The bonuses are located off the main path through the level, with the first in a hidden section to the left of a spot where you have to climb up a rope (you have to throw Kiddy up onto a handle to open the door and then Helicopter Spin through it; the bonus itself has you collect 60 Stars that are divided up by a door) and the second to the right of the top of another rope, behind another door (you have to jump across some handles while avoiding a couple of Buzzes). Koin, however, is the one that can be really easy to miss, as he's located in a section off to the left down a vertical shaft you have to fall or float down to reach the exit. When you reach the section, you have to pull a handle to open a door on a platform above him and then throw the steel keg through the door to make it hit the back wall and roll into him (it's best to have Dixie when attempting this).


Tidal Trouble: Back at the lakeside, this time you have to deal with a strong current that pushes against you when you swim through the water, which is full of Kocos. Topside, you have to contend with Buzzes and Knockas. Fortunately, though, there's an Enguarde Barrel beneath a bit of boardwalk early on, which not only makes dealing with the underwater enemies easier but the current as well, since he's unaffected by it. In fact, the first Bonus Barrel is behind a couple of hovering Kocos whom you can't get around as the Kongs without taking a hit (you just have to collect 30 stars in a small stretch of water; a Lurchin is here but you don't have to take him out to complete the bonus). The second bonus is much trickier to reach: you have to bounce off a couple of Knick-Knacks to reach one elevated section of boardwalk and then use Kiddy's Water Skip to reach another platform across from it that has the Bonus Barrel (it's the game's first, "Bash the Baddies!", where you have to take out a group of Knick-Knacks while completely across a parallel rope; easy enough, but you have to watch where you hit the Knick-Knacks or you lose). The Knick-Knacks you use to reach the platform you do this from don't respawn, so you have to lose a life and restart from the Continue Barrel to try again if you mess up. As for Koin, he's right at the start and is easy as crap: you just have to Team-Throw yourself onto the roof you start out under in order to grab the steel keg and throw it behind him.


Barrel Shield Bust-Up: In this first level, you climb your way up through the insides of a pair of enormous trees where, in addition to Buzzes, the main hazards are lines of Minkeys throwing nuts at you. While, as the title suggests, there are many spots where you can use Barrel Shields for protection, there are also many sections where you have to wait for the Minkeys, whether it be entire groups, pairs, or individuals with in-sync patterns, to throw the nuts and then quickly climb past them, as well as spots where the Barrel Shields move up and down, forcing you to do the same in order to keep yourself safe. Needless to say, the trick here is timing and patience and, if you can manage that, you'll be just fine. The first bonus can be found by using a TNT Barrel to blow through the left wall of a tree trunk beneath the Continue Barrel (you have to climb up a rope and avoid the nuts being thrown by the Minkeys to reach the coin; you really have to watch their throwing patterns, as there are no safe spots here), while the second can be found right before the end but can be trickier to get to. You have to blast through the left wall of the tree trunk again but this time, you have to climb your way up to the opening at the top and then Helicopter Spin through the opening across from it and continue straight through the opposite tree trunk, all without touching the edges of the openings; if you do, you'll end up falling and have to do it again (you have to collect 15 bananas while avoiding nuts again, which is really difficult as, remember, you also have to account for the time limit as well). As for Koin, he's located in a section in the left tree above where the 'N' can be found and while the steel keg is sitting right in the opening, you have to be standing outside when you throw it or he'll turn around and block it.


Riverside Race: At first, you may think that the race in question is against the swarm of bees that begin chasing you when you start the level and will stay on your tail all the way to the end. While they do provide you with an incentive to move as fast as you can to avoid getting stung, the real meaning behind the level's name is the race against Brash Bear's record time of 1:15. The counter in the lower right-hand corner of the screen keeps track of your own time and if you manage to make it to the exit flag quicker than Brash, he'll be so angry when you come upon his cabin later down the path that he'll throw a tantrum powerful enough to open up the path leading to Kremwood Forest's Crystal Cave. In addition to that goal, you have the usual bonuses and the DK Coin, although they can be tough to get and easy to miss when you're trying to avoid the bees. The first bonus can be found atop the ridge on the other side of the second body of water and can only be reached by Kiddy's Water Skip (you have to grab 15 bananas that materialize above a small pool harboring a single Koco), while the second one, which is located at the end of the water below the 'N,' requires you to grab an Invincibility Barrel at the bottom and use it to bounce off the red Buzzes to reach it (you must take out four Re-Koils; it's best to steamroll them with Kiddy). Koin is hanging out on a ridge on the left side of the last stretch of water and can also only be reached by the Water Skip. The best way to do this is to run past the goal flag, after which the bees stop chasing you and you can then try to get up there without fear of getting stung.


Squeals On Wheels: (That has to be a play on the title of the Jackie Chan movie, Meals On Wheels.) This level is similar to Doorstop Dash in that you have to open up a number of metal doors to progress, this time by taking out any dynamo wheel-running Sneeks that are nearby. You have to do this throughout the entire level in order to ultimately open the door leading to the flag, which is actually just to the right of where you start (the barometers in the background that gradually change from red to green as you take out the rats indicates how close you are). This may sound simple enough, especially since there's always a steel keg nearby to do this, but as the level goes on, Buzzes, particularly the red kind, tend to get in the way of your shots. All in all, it's not that difficult. Like the previous mill levels, the bonuses are hidden off the beaten path. The first one is located to the left of the 'O' and you can use the wheel there to reach it (you have to jump back and forth across two dynamo wheels in order to collect 20 stars) and the second can be reached by Team-Throwing yourself from one dynamo to another past the Continue Barrel to reach that houses it (this time, you have to use two dynamos to grab 15 bananas). As for Koin, he can be easy to miss since he's hidden up and to the right of the letter 'N' but, fortunately, you can use the steel keg there to take out the green Buzzes blocking the way and then use the dynamo to hop up to the ledge. Actually hitting him is very simple. And you're actually introduced to Parry the Parallel Bird in the stretch to the goal, who'll turn into a 3-Up Balloon if you manage to reach the "No Parry" sign.


Bobbing Barrel Brawl: Throughout this second trek by the riverside, you play as Ellie and use her water-spraying skills to knock enemies out of your way and throw barrels into the water to use as stepping stones to avoid the hungry Nibbla who stalks you throughout the level. While not exactly a difficult level, Ellie isn't the most surefooted character in the game, so jumping across the barrels can be rather hair-raising and you have to aim your water squirts and barrel shots as best as you can in order to succeed, which can be difficult to do at certain angles. The first Bonus Barrel can be found beneath a red Buzz hovering above a stretch of water and you can reach it by taking out the Booty Bird above the Buzz, who'll drop a TNT Barrel on him in response (you have to throw a line of barrels across a stretch of water to reach the coin without getting chomped by Nibbla). The second bonus is at the bottom of a pool about 3/4 of the way through that Nibbla can't reach but you have to cross the pool, wait for two Knick-Knacks to crawl and hover into place above it, and then bounce off of them to jump high enough to reach the bottom (you have to collect stars while jumping across floating steel kegs and avoiding Nibbla again). Koin is found right before the Continue Barrel and the steel keg needed to take him out is right beneath a couple of red Buzzes to the left of him. You can use the suction power of Ellie's trunk to bring the keg to you and then throw it over both Koin and the red Buzz hovering above him to knock him in the back.

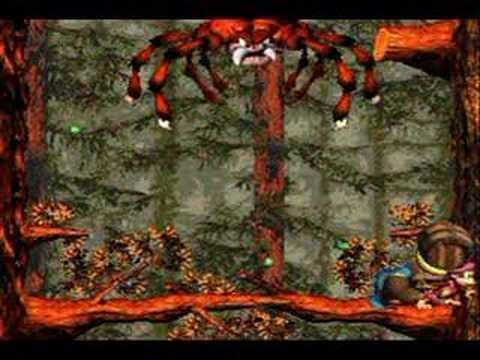
Arich's Ambush: The boss of Kremwood Forest is an enormous spider who initially attacks by bouncing up and down in this very small space from a thread of webbing. His one weak point is his jaw and the first barrel you need to whack there with his located on top of him at the start of the battle, with subsequent ones appearing on the small, upper right branch which, as you can see, you can reach by jumping on his back again. The first two times you have to hit him, it's not that hard, although you have to make sure not to let his enormous claws break your barrels (his claws are the only parts of his body that can hurt you), but once he takes a second hit, he spits globs of bouncing venom around the stage. The first wave, which consists of three globs, isn't too hard to avoid, as you can take cover in the lower right-hand corner, but when you whack Arich for the third time, he'll spit out six globs in various directions and you have to retreat from that spot to avoid the last couple. The problem is not the risk of taking a hit but rather the globs breaking your barrel, which is especially hard to avoid with Dixie since she holds them over her head. It's a little annoying but, eventually, you'll be able to knock Arich down for the count, after which he'll spit up a patch Funky can use to fix up his hovercraft and allow you access to the game's next two areas.


Bazza's Blockade: The first underwater level, which, as you can probably gleam from the title, is filled to the brim with Bazzas, as well as other aquatic baddies like Kocos and Bounty Basses. At first, the number of enemies may seem overwhelming but, once you get their movement patterns and how apart their spacing is down, it's easy enough to dodge them. The only spots that are tricky are those where you have to swim downwards through lines of Bazzas with very small gaps in-between the fish or, even worse, when you have to swim in-between two in a line in order to get through a narrow passage. There is an Enguarde Barrel here but it's near the end of the level, so you have to stay on the defensive the whole time, but, again, it's not all that difficult. The first Bonus Barrel is in a gap below a constant line of Bazzas not too far from the start (you have only 15 seconds to get around Bazzas and Lurchins), while the second can be found in the left side of the narrow passage filled with Bazzas near the end, so it's best to go turn into Enguarde and swim back through (you have to take out ten Kocos, which is simple enough and you can even spear them after they swim through the tubes of coral by into them after they've swum in). Like all of the underwater levels, the exit flag is in a cavern at the end, which is also where you can find Koin. You just have to stand right on his shield in order to successfully throw the keg behind him.


Rocket Barrel Ride: Each one of these waterfall stages has a different way for you to make your way up; in this case, you use the handy rocket barrels that fly up for a short distance before shooting you up the rest of the way. While this is simple enough at first, later in the level you have to blast around Buzzes that are right in your way, and while on foot, you have to deal with enemies like Krumples and Krimps (note how, in these types of levels, the latter's pained yells echo loudly). Some parts of this level are annoying, especially a spot near the end where you're saddled with Parry and have to get him around pairs of Buzzes that hover parallel with each other (your reward for making it to the sign with him is a 3-Up Balloon), and you have to keep in mind that some of the barrels can be found on ledges behind the falls, but there are much more difficult waterfall stages down the road, so it's best to view this one as practice. The first Bonus Barrel is at the spot where the 'O' is and you have to blast yourself over a Buzz and bounce across three Knick-Knacks to reach it (you have 15 seconds to collect 20 stars using rocket barrels, which can be difficult due to how they blend in with the waterfall; also, this bonus is right before the Continue Barrel, so if you mess up and die while trying to get to it, you'll have to start the stage over again). The second bonus is off the beaten path near the end and requires either a Team-Throw or a fall from above to reach (you have to collect 60 stars in 35 seconds using rocket barrels and it's possible to fall to your doom because you're blasted up so far that you lose sight of the barrels; the trick is to follow the trails of stars that lead downward). Koin is to the left of the goal flag and to knock him out, you have to throw the keg and then immediately jump into an automatic Barrel Cannon there to blast ahead of it and behind him.


Kreeping Klasps: One last lakeside level, this one has the combined threat of Nibbla prowling the water and the introduction of the TNT Barrel-wearing Klasps, who move back and forth across the ropes. There are spots where you have to get on the same section of rope as some Klasps and then quickly drop to grab an item before they hone in on you. In short, you need to have quick reflexes with your button-pushing in order to avoid getting blown to kingdom come or falling in the water and getting chomped. On a good note, the stage isn't very long and there are a couple of 1-Up Balloons near the start and plenty of bananas throughout. The first Bonus Barrel is right in plain sight but you have to avoid two Buzzes who rapidly fly back and forth around it (you have to grab 15 bananas that appear along two parallel ropes suspended above the water; when dropping from the top rope to the bottom, you have be careful not to fall in the water or Nibbla will chomp you and it'll be over). The second bonus can only be accessed via a Barrel Cannon below another pair of parallel ropes that are occupied by three Klasps: one on top and two on the bottom. You have to time your drops precisely and do them quickly (you have to make your way across a line occupied by four Klasps and avoid falling in the water to reach the coin). Koin is before the flagpole but the steel keg is beneath a roof behind it, so you have to grab it, carry it over to Koin, jump on his shield (if you're not careful, he'll push you into the water), and then throw it behind him.
Tracker Barrel Trek: This time, we have the Tracker Barrels, which follow you along a designated path while continuously blasting you upward, to help make your way up the waterfall. Other than that, during the first third of this level, it may not seem that much different from Rocket Barrel Ride but, after the Continue Barrel, you get turned into Ellie and remain as her until the end. Because of her lousy jumping skills, in order to get around the Buzzes that are often in your path, you have to use her water-spraying trunk to take them out, often while being blasted repeatedly out of a Tracker Barrel. Other enemies in the level include more Krumples and the hedgehog Bristles, so it's best to let Kiddy take the lead during the first bit. The first Bonus Barrel is located across from the first high ledge you get blasted onto and you have to use Dixie's Helicopter Spin to reach it (you have to collect 70 stars in 25 seconds using two Tracker Barrels, a task that can be hard to complete since, again, the stars blend in with the waterfall and because of how they're hidden in the corners). The second Bonus Barrel is behind a waterfall right past where you first become Ellie and you have to use a Tracker Barrel while squirting a couple of Buzzes out of the way (you have to take out seven Knick-Knacks, most of whom are hovering above a long drop; the one that hovers above you right at the start can be hard to reach due to Ellie's poor jumping and can cause you to fail if you jump too hastily). As in Rocket Barrel Ride, Koin is at the very end of the level but, this time, you only have one chance to hit him, as Ellie turns into the steel keg you need. It's best to stand to the left of him, throw the keg to the left, and then quickly jump on his shield so it'll hit him when it rolls back (if you're standing too far from the wall, the keg will disappear off-screen and not return).


Fish Food Frenzy: This is the level where Nibbla serves as a sort of ally to you. He follows you throughout the level, munching on any enemies in your path, but if he goes for long stretches without eating anything, he'll start to go hungry and his color will change from happy blue to purple, pink, and finally red, where he'll then take a bite out of you to appease his hunger. Also, for every Lurchin that he eats rather than a Koco, his color will go down a shade as well, so have to try to orient him around the stuff you want him to eat and the stuff you don't want him to eat. That's tricky, though, because he'll automatically go whatever's nearby, and it's inevitable that he's going to eat a Lurchin sooner or later, especially when you have to swim through big schools of them. Fortunately, there are a lot of Kocos here as well, so if you just use strategy, you shouldn't get bitten. The first Bonus Barrel is in a spot not too far from the start and has some Lurchins swimming near it (you have to collect 15 bananas in an area where there are no enemies whatsoever), whereas the second is hidden in a vertical path near the exit, which is where you need Nibbla to eat a Lurchin to reach it (you have to get Nibbla to eat ten Kocos in 40 seconds, which can be tricky due to the way he tends to follow right behind you). In the cavern at the end of the level, Koin can be found on an upper ledge to the left of the flagpole. Knocking him out has no challenge to it at all.


Squirt's Showdown: I really don't know what Squirt is supposed to be but he looks like an enormous snail head that's part of the wall behind the waterfall. You change into Ellie for this battle and you have to use her water-spraying attack to succeed. Squirt's way of attacking is to shoot a spout of water out of his mouth that rotates around the stage, forcing you to jump across the ledges on either side of him to avoid getting sprayed off. Besides his spout, you also have to be careful when you're jumping because the slippery quality of the ledges and Ellie's less than sure-footing can cause you to slip off (that happened to me many, many times when I was a kid). Once Squirt stops his attack, he peeks his eyes out from behind the waterfall and you have to spray him in the eyes until they both close completely (if you don't get them in one try, you'll have to wait until he gets through spraying again in order to finish the job), after which he'll open them back up and begin again, this time with a spout attack that lasts longer and tends to change direction. You have to repeat this pattern two more times to defeat Squirt and as a prize, you receive one of two skis that you'll eventually need to give Funky so he can complete his next vehicle.


Fire-Ball Frenzy: As if having to jump and climb over vats of molten steel while dodging enemies like Buzzes wasn't bad enough, here you also have to worry about Karbines, the fireball-shooting owls who fire at you from the background. During the first half of the stage, you have to contend with only one Karbine in a given section but, after the Continue Barrel, you'll find yourself with groups of up to four who either alternate their firing patterns between themselves or follow you as you ride up lifts or make your way up a series of ropes. One thing that's useful to know is that, once a Karbine's fireball bounces on the ground, you can walk past it without getting hurt, but it sure doesn't help in those latter sections. Basically, you have to keep on both what's ahead of you and in the background, which can be quite challenging. The first Bonus Barrel is located in a section off to the left of a vertical shaft you drop down after the Continue Barrel but you have to float across a steel vat to reach it (you turn into Squitter and use his webs to take out some Buzzes), whereas you have to Team-Throw up to a lift while avoiding a lone Karbine's fireballs to reach the second (you have to collect 15 bananas while dodging a pair of Karbines' fireballs). Koin can be found to the right of a vertical shaft before the home stretch and you have to grab the keg, stand on his shield, and then toss it to the right while making sure the Karbine there doesn't mess up your shot with his fireballs.


Demolition Drain-Pipe: I hate these lightning-fast toboggan levels; everything zips by so quickly and frantically that it's hard to focus on anything and you have barely any time to react to what's ahead. This one is a cruel introduction to these types of stages, as it's as fast as they come and is chockfull of Buzzes and Knick-Knacks placed in your way, often forcing you time your jumps in the precious few moments you have to do so, as well as other hazards like gaps, which sometimes have tempting items in the middle of them, and pipe-heads you have to jump across. You also often have to quickly alternate between riding across the floor and jumping up to sections of railing on the ceiling and vice versa in order to avoid the hazards. As if the level itself wasn't bad enough, the bonuses are both difficult to get into and just as frantic as the main stage. The first is invisible and found above a Buzz floating under a vertical tunnel in the ceiling (you have to defeat a group of Knick-Knacks while rushing through a section of pipe; you only have one shot to get them all, so if you miss any, you have to purposefully lose a life to try again), while the second is also invisible and is found in a pit near the exit (you have to collect a bunch of stars while whipping through another tunnel, while also avoiding a couple of Buzzes that show up in your way). Fortunately, beating Koin is a simple matter of grabbing the steel keg, jumping across a Barrel Cannon to reach him, and throwing the keg behind him.


Kaos Karnage: As intimidating and difficult he may seem when he first appears, Kaos is actually not too difficult to defeat once you know his pattern. He first tries to burn you with blasts from his jet engine below while hovering back and forth but you can easily run underneath him to the other side when he's not trying to do so. Eventually, he hovers in the middle of the room as blades whirl around his body, which you can use as stepping-stones to reach and stomp on his head. The only thing to worry about here are boxing gloves that punch out of his sides and can knock you off, wasting your time. Once you stomp his head, he repeats the same pattern twice more and once you've hit him the third time, his helmet flies off and hovers nearby, as his head is revealed. His attack pattern remains the same but when you hit his actual head, the helmet starts following you around while firing laser beams at you. You have to dodge these for a little bit, with the trick being to get out of the way once the helmet's visor glows bright-yellow, and eventually, Kaos gives you another opportunity to whack his head. You have to do this two more times to eventually defeat him and win the other ski that Funky needs but Kaos' dialogue makes it clear that this isn't the last you'll see of him.


Krevice Kreepers: The first of several cliff-side levels where you gradually make your way upward, this one introduces Klasps who are much more intelligent than the ones back in Cotton-Top Cove. Rather than crawling back and forth across the ropes, these hone in on you the minute you're nearby, either by climbing right at you as soon as you get on the same rope with them or, even worse, positioning themselves right above or beneath you on parallel ropes and following your every move. Those latter situations can be very tricky, especially when the Klasps are just out of sight and you have to quickly jump up or drop down three ropes in a row that are occupied, and you have to really work to get around them safely, which is also made difficult by the fact that some of them move very quickly. There are Buzzes here as well but the Klasps are the main threat and, not surprisingly, one of the Bonus Barrels is guarded by one. Near the start of the level, you have to get a Klasp on a long rope to follow you to the right, jump up onto the far right of a smaller rope up above, wait for him to get right beneath you, and then quickly drop down and scramble to the left to reach the barrel, where the bonus game is having to collect 30 stars while dodging another Klasp. The second bonus is about 2/3 of the way through the level, in a nook in the right cliff-face above three parallel ropes occupied by Klasps, and it's much easier to get to, although you have to watch out for Knocka in the passage who can knock you off (in the bonus, you have to jump up ropes past two Klasps to reach the coin). Koin is early on in the level, before the Continue Barrel, but hitting him is a little difficult because you have to throw the steel keg up against the wall and then quickly run underneath the section of ground Koin's standing on to get ahead of the keg and make him expose himself to it. It's best to use Kiddy for both the throw and use his roll to get ahead of the keg.


Barrel Drop Bounce: This is definitely the toughest waterfall level in the game (I'm surprised the water isn't frozen, considering what area we're in), as you have to make your way up by hopping across barrels that come tumbling down the falls. This seems simple enough at first but, after the Continue Barrel (which is quite early on), things get tough as you have to wait for one or more barrels to line up and then quickly jump across them to reach the next ledge before they move out of range. The hardest part of the level is when you have to wait for a line of four barrels to get into position, jump across them, and then jump back to make it to one of the next set that comes down in order to reach the Barrel Cannon that'll blast you to the next ledge. When I first played the game as a kid, I didn't think I was going to make it past the part, as it's so difficult and takes a lot of patience and timing. And just to add insult to injury, Parry shows up during the last stretch and you have to keep him alive until you reach his sign in order to receive a 2-Up Balloon (at least he's not crucial to getting one of the Bonus Barrels, as is the case in some later levels). Koin is located on a ledge to the far right of the start (you have to blast yourself up to the next ledge on the path and then Helicopter Spin over to it to reach him) but getting the DK Coin is very difficult, as you have to get the keg around a gap in the long path leading to him as well as stay ahead of it and make him expose himself. The best way to do this, I've found, is to get on the same level as Koin, toss the keg against the side of the path where the split is, and quickly jump up on his shield so it'll hit him. You have to be far enough away in order to have time to do this but not so far that the keg will vanish off-screen. The first Bonus Barrel is right along the path and can be easily reached by jumping off a barrel (the game is to grab 15 bananas while jumping across the barrels tumbling down the falls) and the second can be reach by a Helicopter Spin to the right of the ledge where the 'N' is (you have to make your way up the waterfall using the barrels in 20 seconds to reach the coin on the upper right ledge).


Bleak's House: This is where playing Swanky Kong's ball-throwing mini-games with Cranky pays off, as it's the gimmick with this battle (there's a sideshow right before this stage on the mapscreen if you need some practice). Bleak, the evil snowman, pops up throughout the background to lob snowballs at you and in order to hurt him back, you have to hit the medallion on his scarf with your own balls. It's easy enough to do this when he's close by but when he pops up way in the distance, you have to adjust your throwing range by pressing up on the control pad when you throw (when he's right in front of you, you have to press down on the control pad accordingly), which can make it difficult to aim correctly and hit his scarf, especially since your snowball may not even reach him before he ducks back down. Once you've hit him a couple of times, Bleak pops up in front and begins blasting cannonball-like snowballs from his hat, which you have to wade out before you can hit him again. Once you do, the pattern continues again and when he shoots cannonballs at you the second and third times, he follows the single ones up with groups of two, three, and four at a time, meaning you have to watch where you are on the screen to avoid getting hit (Dixie is your best bet, since she's smaller and can move faster). Once you hit Bleak's scarf six times, he'll literally laugh himself to death, exploding to a hail of snowballs as a Bonus Coin is revealed as the prize.


Kong-Fused Cliffs: You have to scale a very large cliff while the freaking ropes that you climb up slowly burn away! It's a scrolling level, as you have to stay ahead of the fuse while also watching out for Buzzes and Kopters that appear up ahead. That's where the difficulty lies here: trying to anticipate what's coming next so you can get out of the way or switch to a safer side of the rope, which you have to do a couple of times to avoid series of descending Kopters. There are a number of items off to the sides on the sloping cliffs and if you want them, you have to jump, scramble up the steep slopes (which is not easy with the scrolling), grab the item and quickly make it back onto the rope before it burns out of reach. Probably won't surprise you to know that both of the Bonus Barrels have to be reached this way. The first is at the top of a slope below the 'O' (you have to climb your way up the burning rope while using Arrow Barrels, which change sides of the rope each time you come across one, to blast yourself around Buzzes flying back and forth in front of it; you have to time your jumps with the scrolling screen or you'll jump into a bee, as I tend to do) and the second is hidden in a crevice off-screen near the end and requires a Helicopter Spin to reach it (you have to climb the rope again while this time constantly switching to avoid descending Kopters). Koin is right across from the flagpole, hiding in a small cave in a section of rock, and you have to get on top of it, grab the keg, and throw it to the left from where it was sitting to get it to roll into the hidden Kremling.


Floodlit Fish: They had to put in another dark level where you have to light the way through; in this case, you have to use the bioluminescent Gleamin' Breams to brighten up the environment, although it doesn't last long, so you have to keep finding more to prod with Enguarde's bill (you play as him for the whole level). This place becomes a maze in some spots, making it hard to find everything, and there are a lot of Kocos, who now move more rapidly than before, and Lurchins to get around, with the latter acting like the Kopters in Buzzer Barrage and forcing you to navigate around them as you work your way down vertically descending parts of the path. You also have to be careful when prodding the Gleamin' Breams because the recoil from it can fling you into enemies that are behind you. The first bonus isn't too hard to find, as it's tucked in a corner to the right of the main path early on, and is pretty easy to complete too, in you have to collect 90 stars in a room that has no enemies to get in your way (Enguarde's dash is the best way to get them in a short amount of time). The second bonus, however, is easy to miss, as it's in a gap below the last pair of Lurchins you have to get around while swimming down a vertical shaft near the end (you have to collect some stars in a dark maze but if you follow the trail they make, you shouldn't have any trouble). Koin is also ridiculously easy to beat in the ending cavern, as you're blasted right to the keg and you simply have to stand on his shield when you throw it behind him.


Pot Hole Panic: There are two things noteworthy about this cave level. First, it's where the Kuchuckas, the bomb-throwing cousins of the Knockas and Klasps, make their explosive debut; second, it's a lot like the previous game's Animal Antics, in that make you use of all the animal friends, with the exception of Parry. You start with Squawks, end up at an underwater section with Enguarde, reach another above-water stretch with Ellie, and ride Squitter for the final stretch. The Kuchuckas and the Kopters are the only real pain here, especially the former as they can cause you to easily lose your animal friends when they're throwing bombs at you from above and you need the latter two friends to reach the bonuses. Ellie's section ends with a stretch of water where you have to jump up with her and then jump off her to reach the Bonus Barrel hidden over to the left (you have to use the same method to collect 20 stars) and you have to use Squitter's web platforms to make your way up to an upper ledge across from one housing a Kuchucka to find the second bonus (you have to both watch out for the bombs and make sure not to go past the nearby "No Spider" sign). The bonus itself is pretty difficult, as you have to collect 15 bananas while avoiding a Kuchuckas bombs, with the problem being that the time it takes for an explosion to clear is also enough time for a banana to vanish before you can grab it, leaving you vulnerable to the next blast. Koin is right past the "No Spider" sign and you have to use a Team-Throw to reach him, another to reach the keg, and then stand on his shield and throw it to the left to hit him (he's too close to the right wall for it to work).

 |
This is from the Game Boy Advance version of the game. I
couldn't find an image of Barbos from the Super NEs game.
|


Lightning Look-Out: Here's the first truly sadistic level in the game. You have to make your way across a riverside during a thunderstorm, dodging bolts of lightning that repeatedly strike around you and appear to hone in on you. There is a pattern in that you see a small, warning flash before the real bolt comes down, giving you time to get out of the way, but you've also got Buzzes (often in pairs you have to either jump through or under and in front of small slopes, no less) and flight-less, yellow Knick-Knacks in your path and getting around them while trying to avoid the lightning is very challenging. Also, if you're in the water when the lightning flashes, you take a hit no matter where you are, and there are spots of water everywhere here, including a long stretch where you have to roll under some Buzzes towards, and often falling into it, and then jump to some bobbing barrels to make it across (it's very hard to get past that section without taking a hit). The lightning can be useful in that it takes out enemies caught in its path and you can use the invulnerable red Buzzes as shields when you need to catch your breath but that doesn't change the fact that this level can drive you mad if you let it. The first Bonus Barrel is, as you'd expect, at the bottom of some water, so you have to wait for the lightning to flash before attempting to go for it (you have to take out some Knick-Knacks hovering above water, which can be difficult to do without hitting one's side because you have to angle your jumps out of the water accordingly). The other hovers above a series of bobbing barrels and requires a Team-Throw to reach, which you have little time for due to the lightning (you have to collect 15 bananas while avoiding lightning strikes, which actually isn't that hard). Koin is found in the stretch leading up to the Continue Barrel but you have to get the keg from a nearby Booty Bird, meaning you only have one shot, and you have to try to hit Koin while still avoiding the lightning. In conclusion, don't be surprised if you lose a few lives here.


Koindozer Klamber: That last statement also goes for this awful level. Koin's pink-colored cousins, the Koindozers, are some very challenging enemies. They can't be killed, for one, and for another, as soon as you get near one, he'll charge at and push you around relentlessly until you end up at the bottom of a pit. Like Koin, you can safely stand atop one's shield but if you get too close to the edge, you'll be pushed off and the shoving will resume. Jumping on the shields really comes into play here, as you have to jump across a series of Koindozers in order to make it past some pits, often landing on a piece of ground right next to one and having to quickly jump up onto his shield before he can shove you. It's best to use Dixie and her Helicopter Spin, which makes it easier to stick your landing on the shields, for the majority of the level but, even then, it's far from easy. You also have to cross gaps using the barrels that Bazukas shoot as stepping stones again, adding to the challenge. And if you thought you could get away from the Koindozers in the bonus levels, think again. In the first one, which is hidden up in some branches to the left of a rope past the first Bazuka, you have to hop across two Koindozers' shields while collecting stars, being sure not to miss those hidden in the trees, and you have to do the same to collect 15 bananas in the second bonus, which requires a Team-Throw from atop one Koindozer's shield to reach. And you have to use a Switch Barrel and turn a nearby Bazuka's ammunition into steel kegs to take out Koin near the end (you can really said barrel by jumping across the Bazuka's shots).


Kastle Kaos: What seems to be the final battle starts off as a rematch with Kaos, who's much easier here than he was back in Mekanos. His attack pattern at first is the same as it was before, as you have to dodge his exhaust flame and repeatedly underneath him until he stops and then use a nearby barrel to whack him in the head. When you do, Kaos loses his head, only for a second, cruder one to take its place. This one shoots bombs up into the air down at you, so have to quickly got out of their range, run to the other side of Kaos, and whack his new head with another barrel. With that, Kaos is down for the count and hauled away, prompting Baron K. Roolenstein to leap out from his hidden control room and admonish you for ruining his plans like a Scooby-Doo villain (no, seriously, he actually says, "I would've gotten away with it if it hadn't been for you pesky kids!") Once he's done rambling on, he begins his own attack, hovering around the room via a backpack with a propeller. You have to dodge him while trying to pull one of the levers on either side of the room (whichever one isn't hanging all the way down) to make a barrel drop down, which you can use to hit him in the backpack. When you do, he bounces uncontrollably around the room and you have avoid getting hit until he manages to regain control. Once he does, he activates his electric dynamos on both sides of the room, sending a long, electrical volt coursing across the floor. You have to jump across a series of levers hanging from the ceiling to get from one side of the room to another, ultimately grabbing the one to the far left in order to drop a barrel on the platform on the right side of the room. When you hit K. Roolenstein this time, he falls and gets a nasty electrical shock, after which he presses a button that moves to the other side of the room. Now, the situation is reversed: the barrel-dispensing handle is on the right side of the room and the platform it lands on is on the left. You must ride on a platform that moves across the room and duck under K. Roolenstein in order to get everything ready to hit him again (one good thing is that, if you lose a life this late, you won't have to fight Kaos again when you re-enter the stage). After he gets electrocuted again, the final phase of the fight begins. Here, the electricity on the floor will zap on and off, with safe platforms and handles on either side of the room. When you pull one of the handles to get the barrel, you have to make sure it doesn't land in the electricity and you have to quickly grab it before it zaps again because, otherwise, it'll bust. You have to hit K. Roolenstein three more times to finally defeat him and send him crashing through his equipment in the background.


Once he's been defeated, Kaos' body drops down and Donkey Kong and Diddy are flung out, with the former wondering what happened and the latter telling him that Dixie has saved the day. This is where we get into an aspect of the game's design that I've never liked: the dialogue text during this stage. There's dialogue text throughout the entire game but mostly, you can skip past a paragraph whenever you want. However, when K. Roolenstein is admonishing you for destroying Kaos and Donkey Kong and Diddy are talking about what happened, as well as Cranky's less than flattering comments and Dixie and Kiddy's reaction to it, the text stays onscreen for a rather long time and you're unable to skip it. You can only watch as the characters move in a very stilted way that's meant to represent them talking. Even worse, the only indication you have as to who's supposed to be talking is color-coding on the text, making it all the more awkward and the lackluster music doesn't help. Granted, this problem doesn't pop up much in the game but it makes it excruciating for me. I've also never been a fan of the photo album line-up of the cast of the characters, as have to watch them move back and forth for a bit before their picture is finally taken feels tedious and takes too long (although, it is fun to see faults in the film when Cranky's photo is taken and for K. Roolenstein's camera to malfunction and flash in his face, catching him off-guard).


Swoopy Salvo: You like woodpeckers? You think they're cool birds? Well, you won't after you get through with this awful stage. The Swoopies, who appeared before in an easy-to-miss appearance in one of the tree levels back in Kremwood Forest, are out in full-force and, when they're not providing you with makeshift stepping stones when they get their beaks caught in the tree trunks, they're blocking your path by flying in long lines through the trees. To get around them, you either have to really watch where you land in-between them or try to take one out so you can get ahead of those behind him, which hardly works. You can become Squawks at the beginning of the level and he's helpful in flapping around the Swoopies and taking out the Buzzes who also occupy the trees but, like Squitter in the previous level, you lose him before the Continue Barrel. Again, there are three bonuses here (this is actually the last stage with bonuses, as the next one has none at all) and are among the hardest in the entire game. The first one, though, which is hidden down at the bottom of a spot in the right tree trunk early on, is fairly easy: if you're Squawks, you turn back into Dixie and Kiddy and have to leap up repeatedly to make three Swoopies get stuck in the tree and use them as stepping stones to reach the coin... in just 15 seconds. The second bonus is a nightmare to reach, as you have to get around a line of Swoopies flying repeatedly through a hole in the left tree trunk (it's really difficult to hit one of them in these instances and it doesn't work at all if you hover in the doorway while spitting eggs) and then get in-between two rapidly-circling, red Buzzes to reach the invisible barrel. Once you do get it, you'll wish you hadn't, as this has to be the hardest bonus level in the game, bar none: you have to grab 15 bananas floating in mid-air while avoiding rapidly-flying, crisscrossing Swoopies! I don't remember how long it took me to finally beat this when I was a kid but I'm sure I threw plenty of tantrums in the process because of how unfair and awful this level. The third bonus, which is easy to miss as it's floating out of sight in one of the spots between the two trees at the start of the home stretch, is much easier, as you only have to use the Team-Throw to collect 20 stars. As for Koin, you're dropped off at his spot after the second bonus and Squawks turns into the steel keg when you pass by the sign above, so you only have one shot again. You have to stand on his shield and throw the keg at the left wall in order to successfully hit him in the cramped quarter of the tree trunk's interior.


Rocket Rush: There may not be any bonus levels to worry about in this, the true penultimate level in the entire game, but that doesn't make it any easier. In fact, if you don't know what you're doing, this level will drive you absolutely insane and can do so even when you do know what you're doing. You have to navigate a large chasm in a difficult-to-control rocket that burns through fuel very quickly. While it's cool in one way in that nothing can hurt you and you can easily take out any Buzzes in your way, the retro-rockets on either side that you use to steer the thing have confusing controls (the left and right buttons on the control pad manipulate which direction the rocket itself will fire rather than which you go; in short, you press left to fire the left-hand retro rocket, making you boost to the right, and vice versa) and you have to keep an eye on the fuel gauge on the right side of the screen, which can drop very quickly. There are two halves to this level: the first has you descending downward and you absolutely have to collect every single fuel canister you come across or you'll literally crash and burn, while the second half begins after the Continue Barrel. You drift down a crevice, collecting two more fuel canisters and a special barrel that gives you a powerful boost and sends you rocketing upwards. This is the hardest part of the level, as you have to make it through this twisting, vertical path while trying to avoid bumping into the ledges and outcroppings in your way, as it'll slow you down and cause you to run out of fuel before you reach the top. There's not much room for error, as you can only afford one hit and still make it to the top and the rocket's hard-to-control nature makes it difficult to get through in one piece. I lost a lot of lives and patience on this insane level. The game's last Koin can be found at the top of the chasm and in order to hit him as he stands on a ledge above you. you have to grab the keg to the right and throw it in a way to where it arcs over him and bounces off the wall. Kiddy is the best choice to pull this off.


Knautilus: Every time you complete a level in Krematoa, you're rewarded with a cog and once you have all five of them, you take them back to Boomer Bear's shack at the beginning, where he reveals that they fit on a small machine he has in there. When the machine's fixed, whatever it does ends up stirring Baron K. Roolenstein's fish-shaped submarine, the Knautilus, from the depths of the lake in the center of the map. The real final battle begins as soon as you board the sub, as K. Roolenstein doesn't waste any time attacking when he realize you were the one who messed up his sub. This fight is much more complicated and difficult than the one at Kastle Kaos. The first part has you dodging a series of fireballs being shot from a pipe-like structure atop the right piece of machinery behind you while also making sure not to jump up and get electrocuted by the surge of electricity arcing across the middle of the room. Once you've dodged the fireballs, the firing and the electrical arcing will stop, giving you an opportunity to use the steel keg there against K. Roolenstein. You have to wait until he moves underneath the vent in the ceiling on his side of the ship and toss the keg up through the parallel vent on your side so it whacks him in the head. When he's hit, K. Roolenstein uses the same vent to get on your side and hovers back and forth across the room. As in the first battle, you have to knock his backpack with the steel kegs while standing atop the dynamos on either side of the room for safety. You have to be very precise in your throwing or the hit won't count. After you've hit him twice, he goes back to his side of the ship and begins the same attack he did before, only now the floor your standing on moves back and forth. Once again, after the fireballs and electricity have subsided, you throw another keg up through the vent to conk K. Roolenstein. In response, he again comes back to your side, only to activate the electricity again, this time also sending an arc towards you from either of the bottom dynamos. Fortunately, the steel keg absorbs the electricity and once the electricity stops, you have a chance to hit K. Roolenstein again. You may think this is easier since he's closer now but it's actually rather hard, as you have to jump and aim straight for the backpack but you have to do so in the exact right spot: if you get too close, you hit K. Roolenstein yourself, and if you're too far away, you'll hit him in an ineffective spot. If you don't hit, he'll turn the electricity back on, forcing you to wait for another opportunity, and it's especially bad if lost your keg right before he turned it back on, because you'll now be a sitting duck for the lower arc of energy. After you've hit him, he'll turn the conveyor floor back on again, making it even harder to get behind the keg, but by this point, it's almost over, so all you have to do is tough it out and you'll pull through. Not saying it's easy, though, as I've had to go do some life-farming when attempting this before as my lives were running low.


You may have defeated K. Roolenstein for the second time but, in order to get the game's real ending, you have to release all of the Banana Birds and then go to Wrinkly's Save Cave, whereupon they'll then take you up in the clouds in the upper left corner of the map to the Queen Banana Bird (whom you can meet beforehand by flying there in Funky's Gyrocopter). With the power of her children combined with her own, she's able to break the seal K. Roolenstein put her on and decides it's time to exact some revenge on him. What follows is a scene Dixie and Kiddy riding atop the Queen as she chases K. Roolenstein, who's piloting a hovercraft similar to your own, across the map, eventually dropping a gigantic eggshell on him and stopping him dead in his tracks. The game ends with a shot of Dixie and Kiddy sitting atop confused, egg-encrusted K. Roolenstein, while Cranky can be seen waterskiing in the background with Funky... until the latter loses control of his boat and crashes off-screen, with Cranky surfacing in the lower right corner of the screen, holding a sign that says, THE END.

Subscribe to:
Posts (Atom)